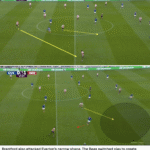
Beesotted contributors The Gowler and Paul Kowalczyk (@BeesBreakdown) give us the tactical and statistical lowdown of Brentford’s loss against Everton.
Thomas Frank chose to stick with a 4-3-3 against Everton. Toney and Nørgaard returned to the starting XI. Reguyilon, Pinnock, Collins, and Ajer started on the backline. Janelt, Nørgaard, and Jensen formed the midfield trio. Wissa, Toney, and Mbeumo started up top in a front three. Thomas Frank had plenty of attacking options on the bench, with Keane Lewis-Potter, Schade, Yarmolyuk and Damsgaard all ready to make an impact.
Sean Dyche’s Everton side came out in their typical 4-4-1-1 with Godfrey, Tarkowski, Branthwaite, and Young along the backline. Harrison and McNeil the wide midfielders joined by Garner and Gueye centrally. Doucourè drifted behind Chermiti up top with Calvert-Lewin not in the squad.
6th Minute
11th Minute
18th Minute
31st Minute
33rd Minute
50th Minute
60th Minute
74th Minute
Summary
Thomas Frank introduced some tactical wrinkles in the first half that initially looked promising and led to a few good chances. They tried to take advantage of Everton in transitional moments and not allow them to set up in their midblock. Occasionally the Bees opted to send in long balls in-behind with limited success.
Brentford held more possession and barely won the xG battle, but still only created 0.88 xG. The difference in the match came off an Everton corner that Brentford failed to clear. Always a difficult sequence to defend with Brentford working to get back into their shape, but overall, an uninspiring performance after smashing Luton the weekend before.
Brentford’s press didn’t have much success with how often Pickford launched long passes. Pickford attempted 39 long passes, and although he only connected on 20% of them, Everton often won the second ball to essentially bypass Brentford’s press.


