
Beesotted contributor Jacob ‘The Gowler’ Gowler (@BeesBreakdown) gives us the tactical and statistical lowdown of Brentford’s win against Brighton.
Thomas Frank selected a “fan-approved” starting XI with Kayode and Yarmoliuk getting a chance to make an impact. The Bees came out in a 4-2-3-1 with Kayode, Collins, van den Berg, and Lewis-Potter along the backline. Nørgaard and Yarmoliuk started as the defensive mdifielders, while Damsgaard occupied his typical number 10 role. Mbeumo, Wissa and Schade, looked to build on their impressive season with plenty of goals between them.
Fabian Hürzeler’s Brighton side came out in a 4-1-4-1 with Estupinan, Dunk, van Hecke, and Wieffer at the back. Baleba the holding midfielder, joined by O’Riley and Hinshelwood in advanced roles. Minteh and Joao Pedro started on the wing, while Danny Welbeck led the line up top.
3rd Minute
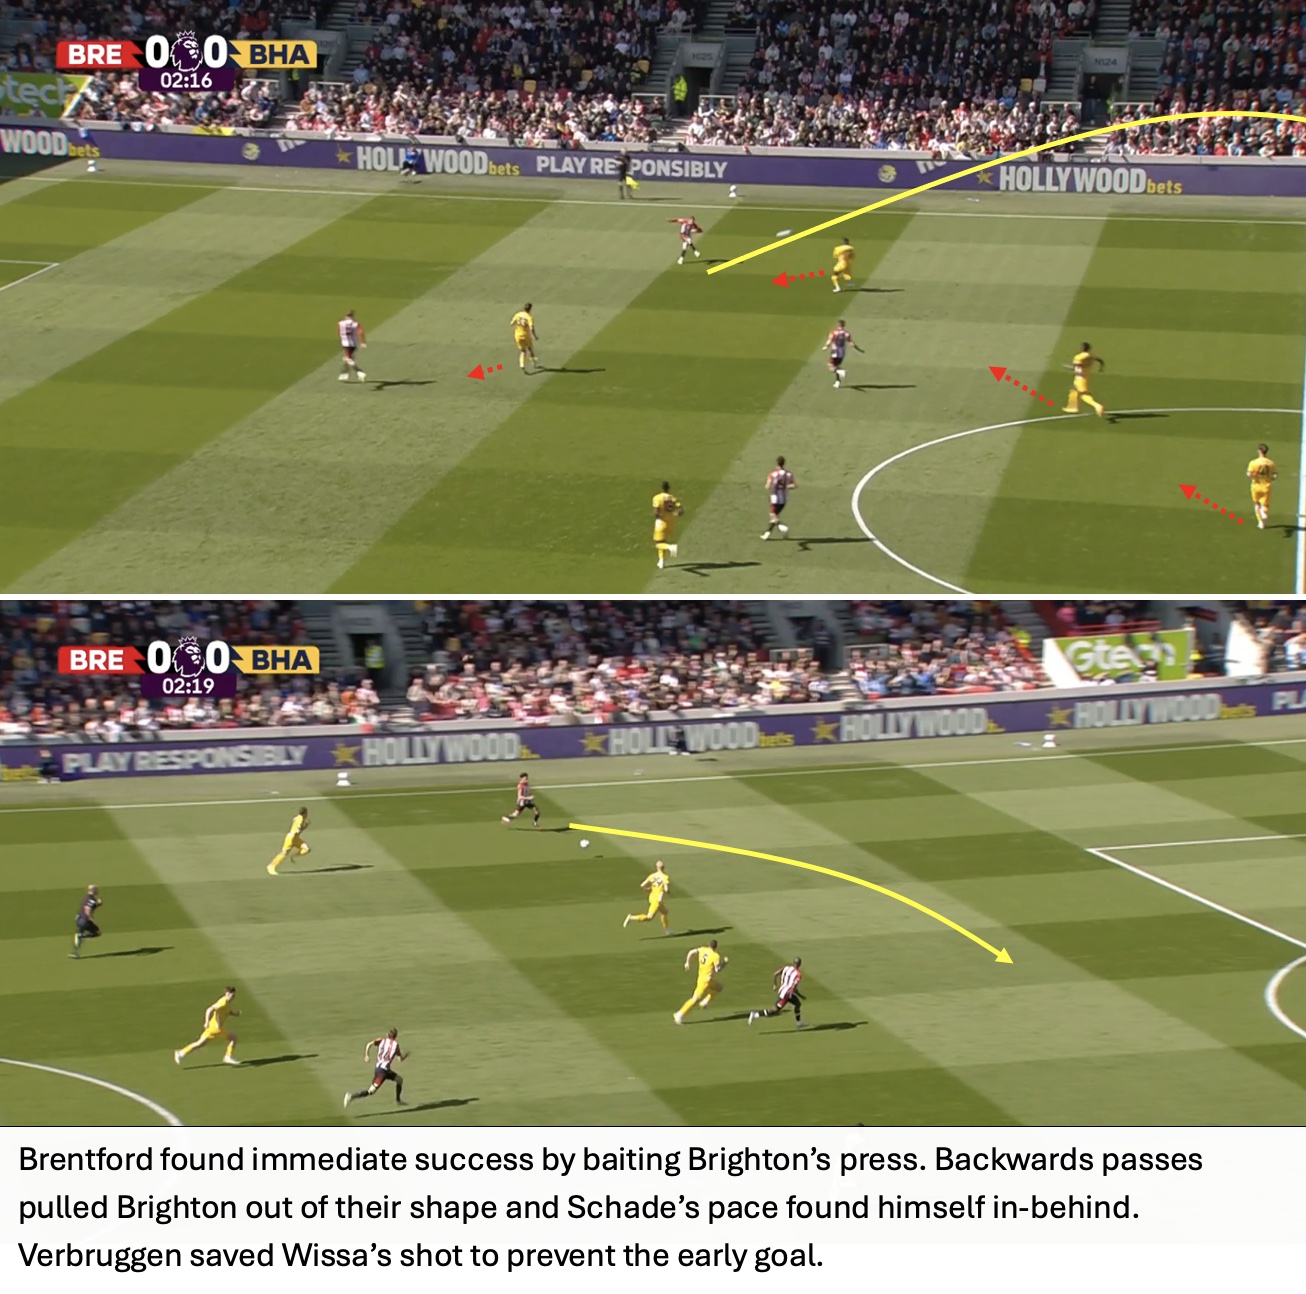
4th Minute
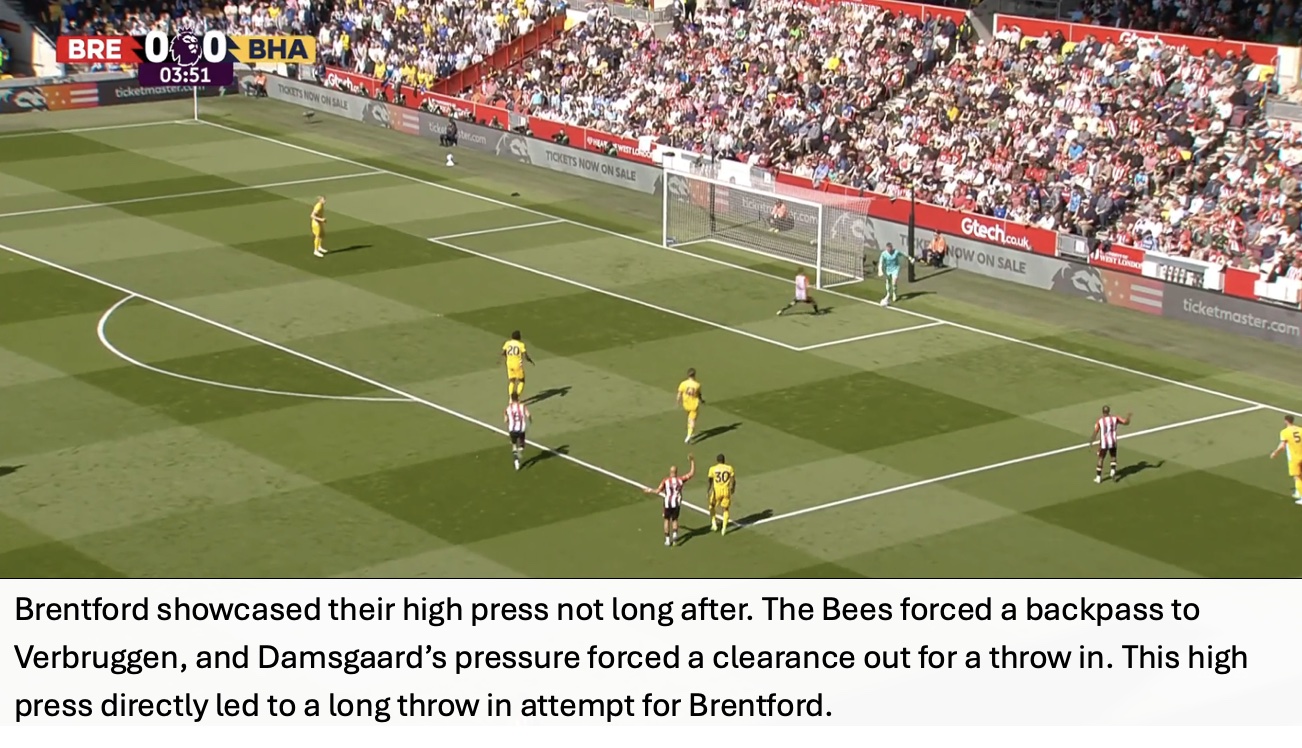
9th Minute
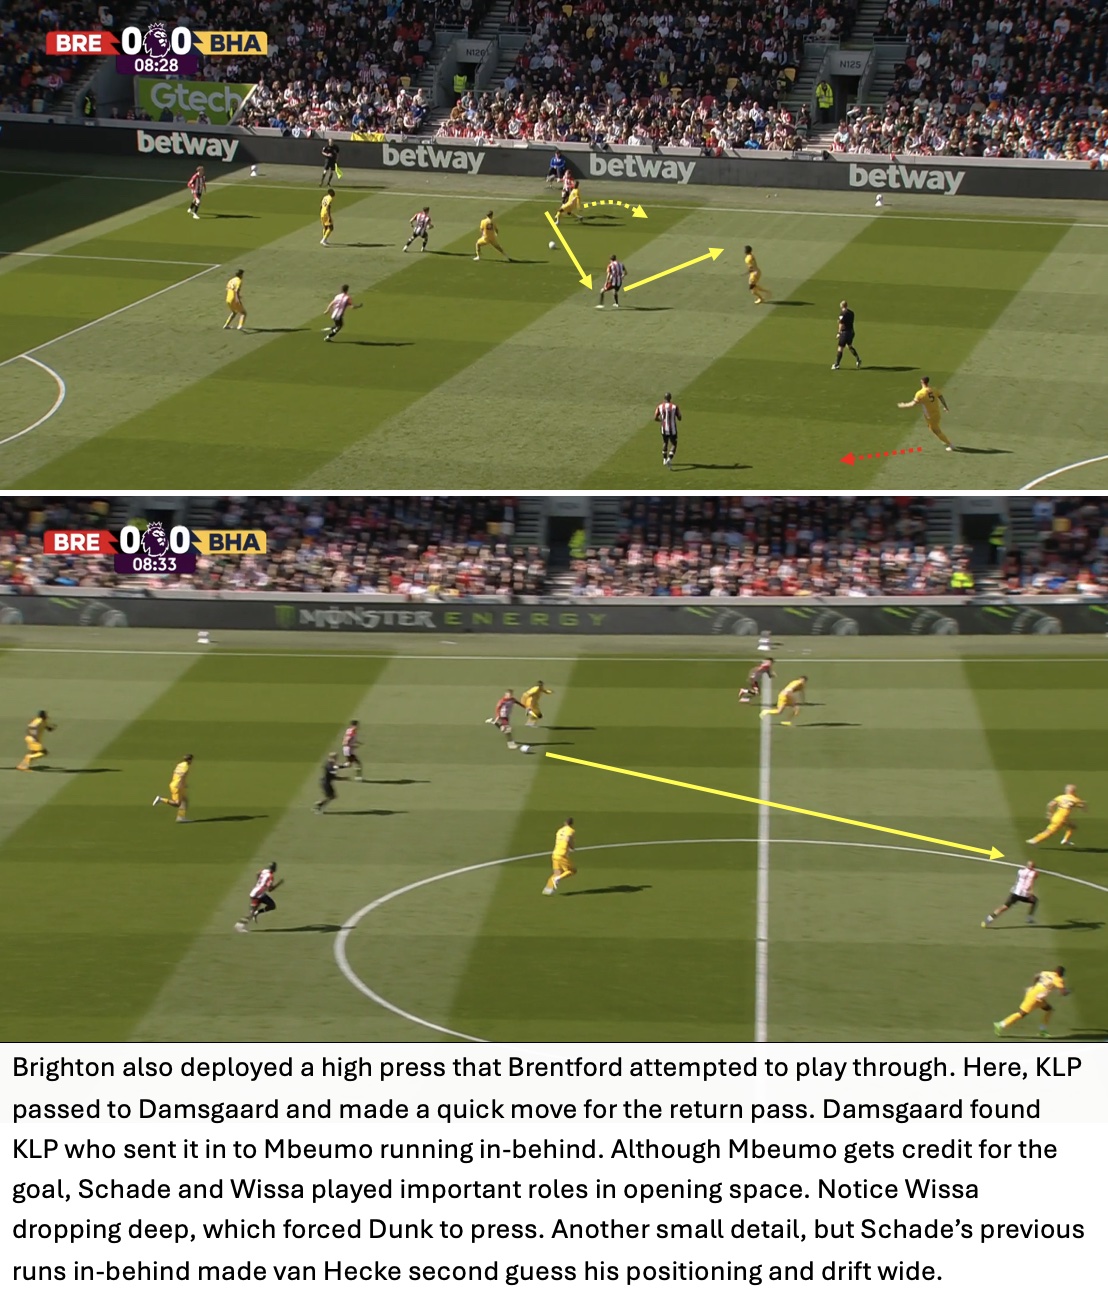
15th Minute

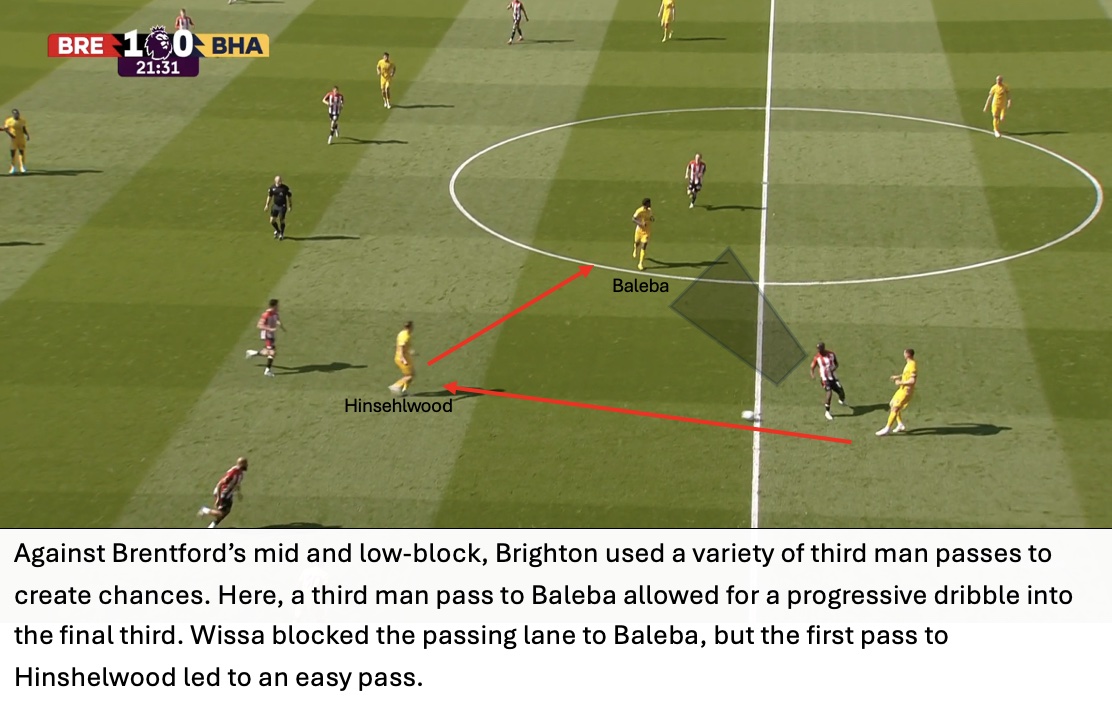
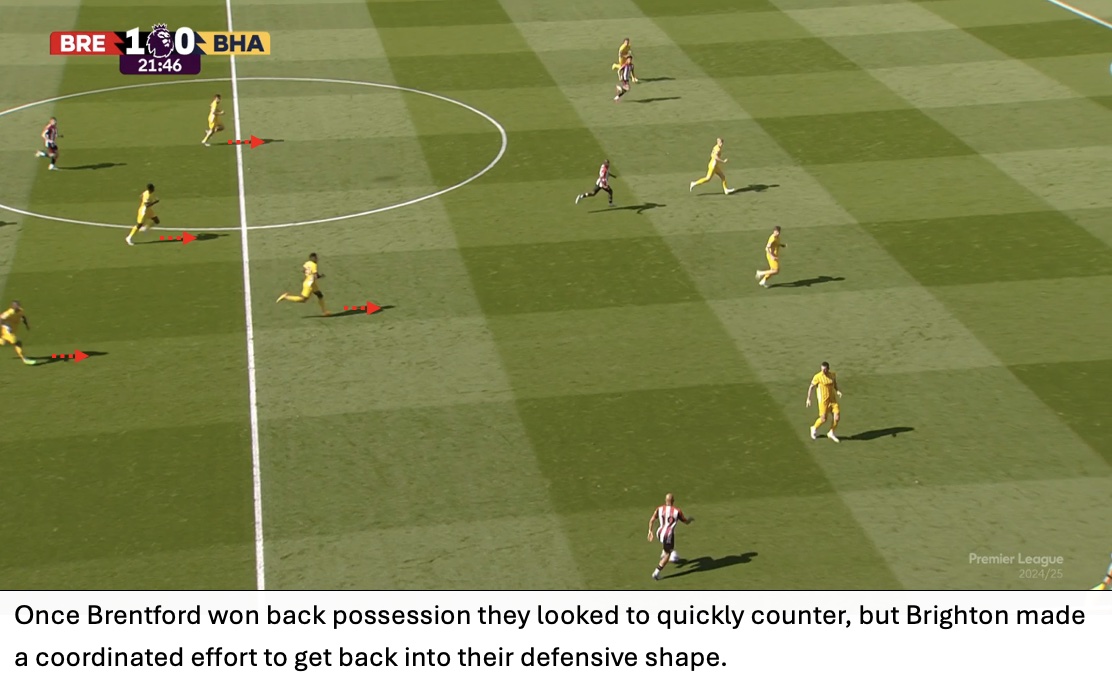
22nd Minute
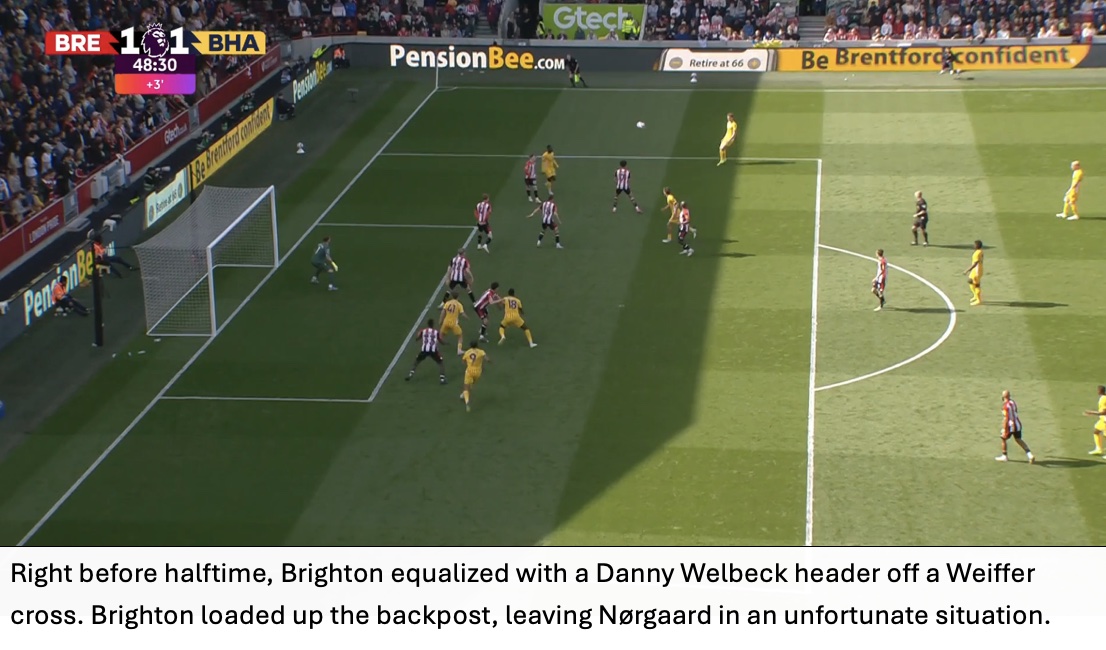
45 + 3 Minutes
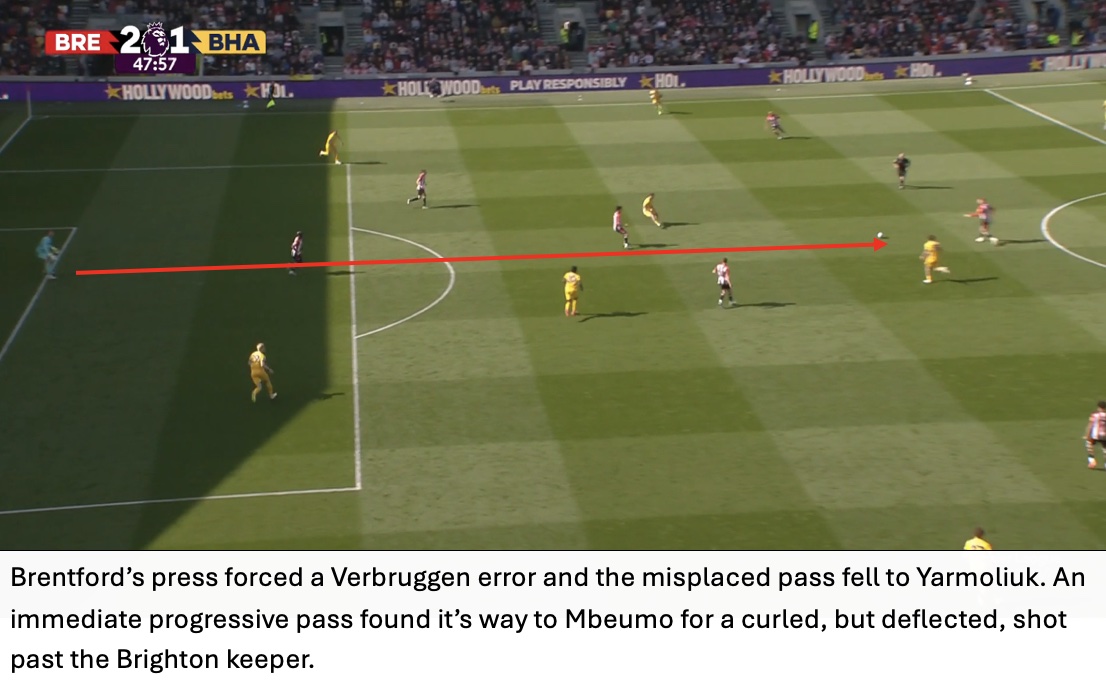
48th Minute
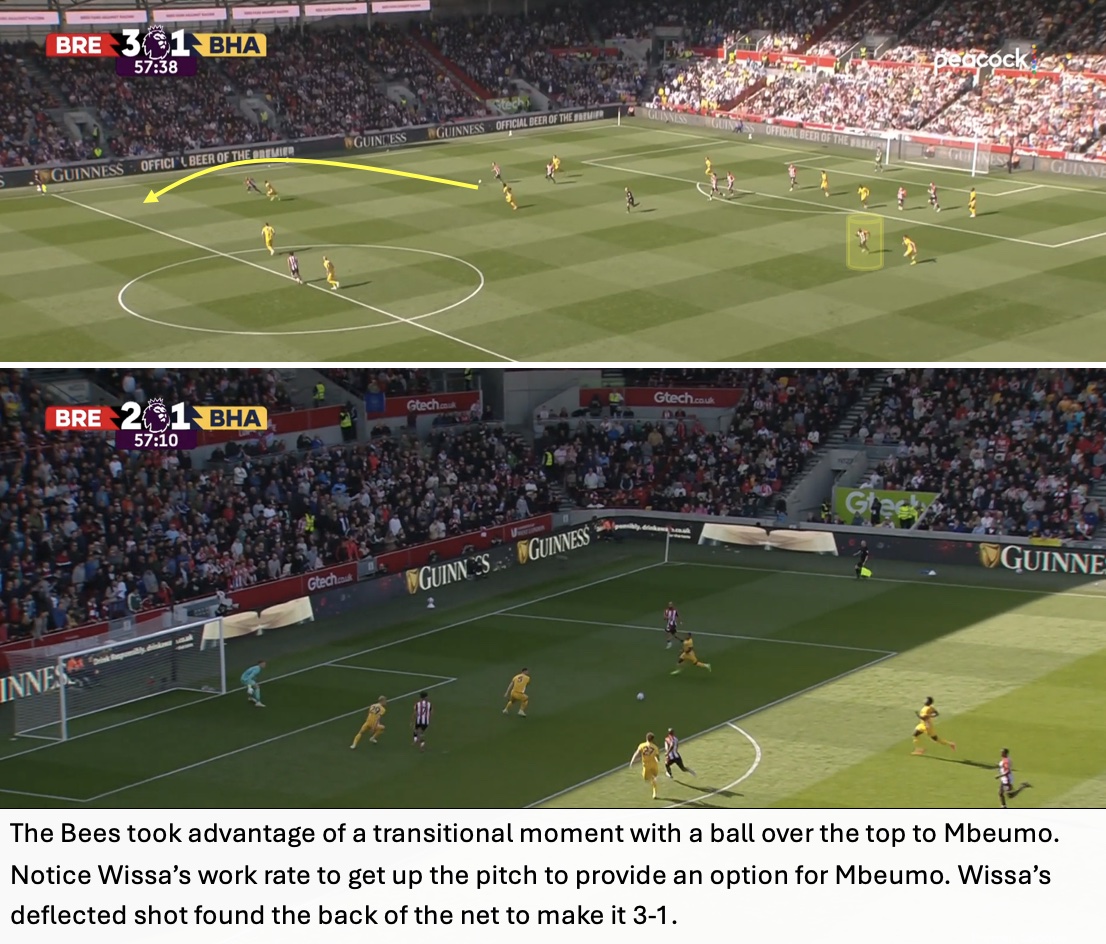
58th Minute
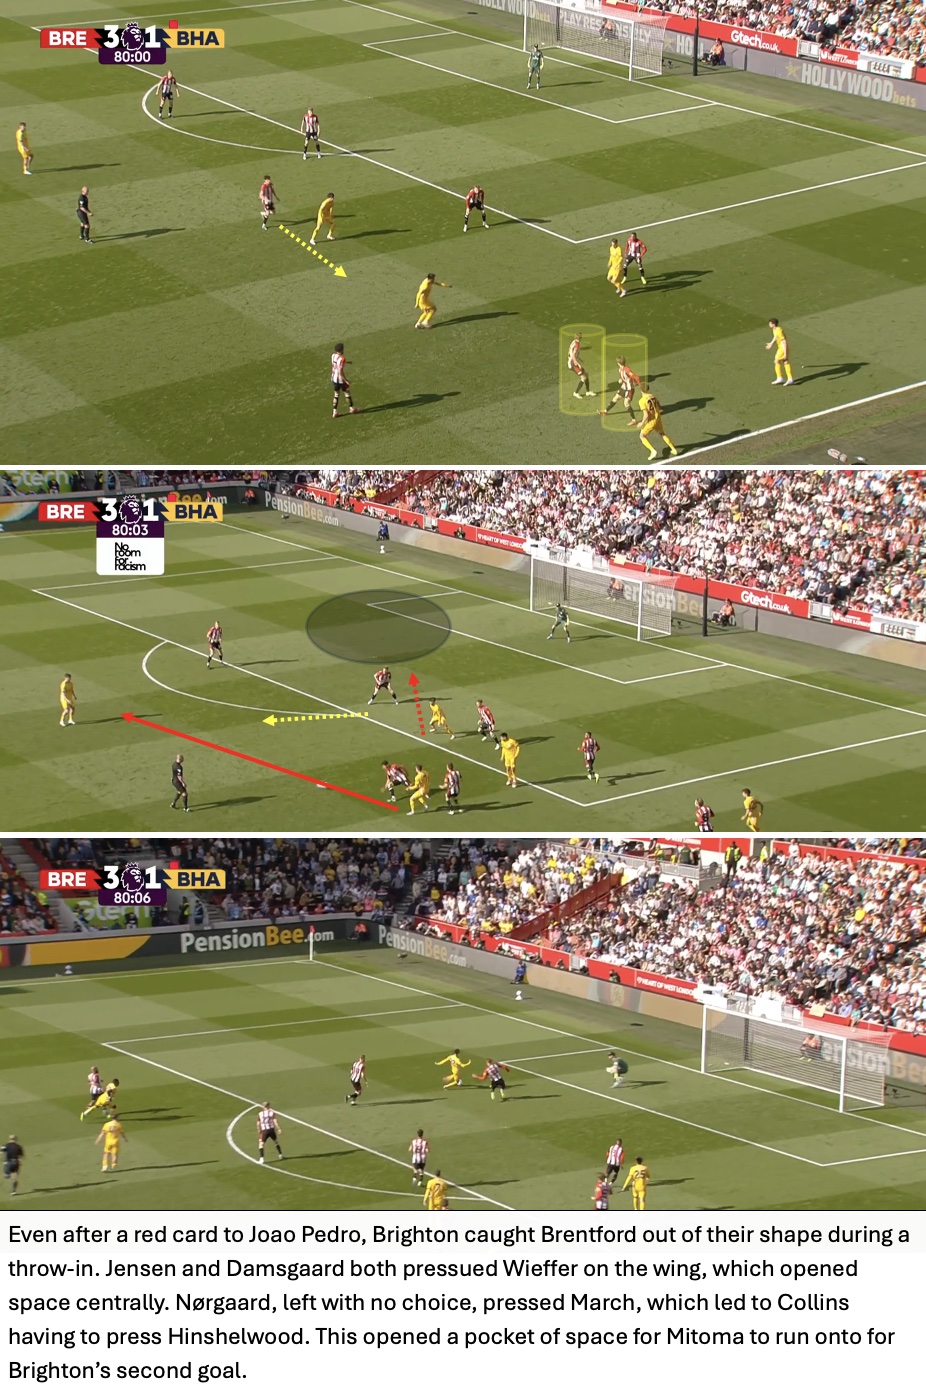
81st Minute
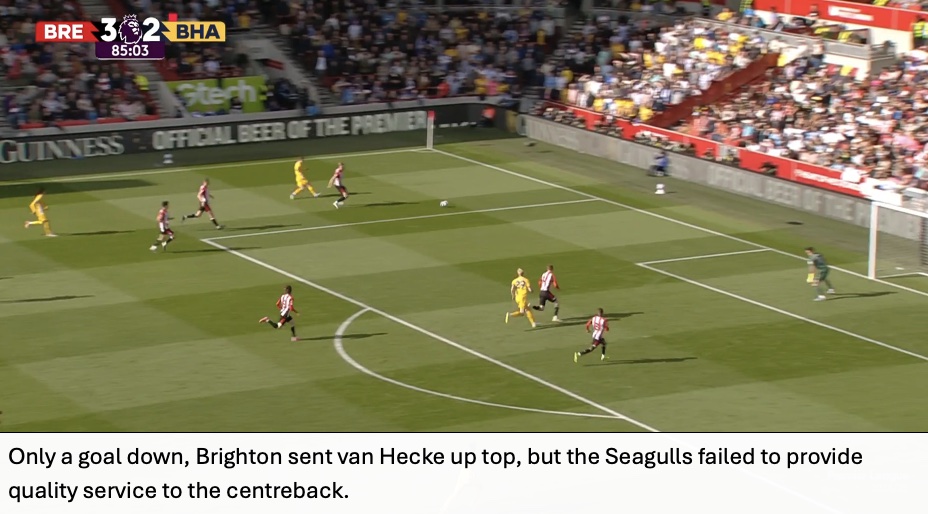
86th Minute
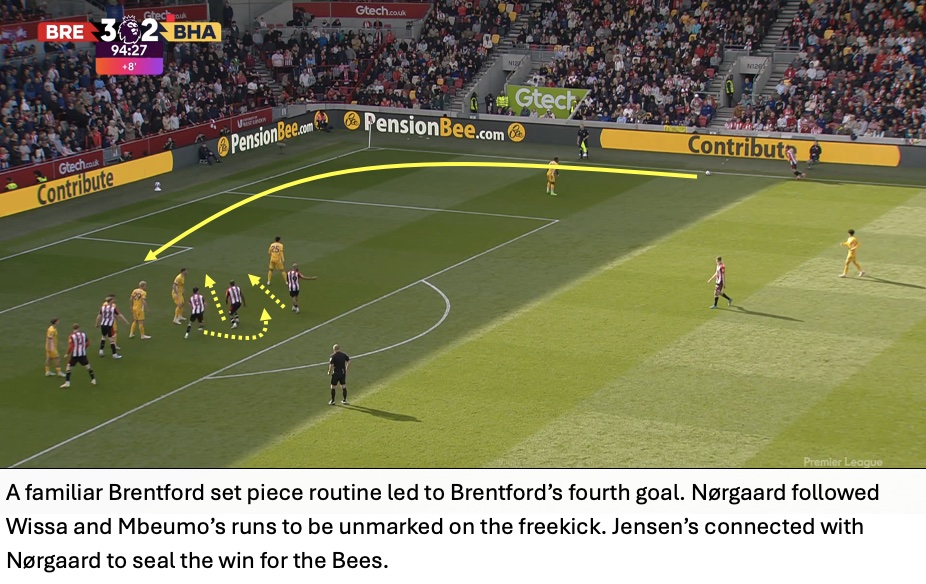
90 + 8 Minutes
Brentford only created 2.17 xG, but their clinical finishing provided 4 goals. Brighton created their fair share of chances, even scoring after being a man down, but Brentford able to hold on for the three points.
As usual, the Bees varied buildup, passing around the back but also playing direct at times. Depending on where Brighton committed defenders, Brentford would attack the weaknesses. If Brighton pressed high, the Bees quickly found the space in-behind. If Brighton sat back, Brentford challenged them to press.
Brentford’s own high press routinely caused trouble for Verbruggen and the Brighton backline, ending with long throws and even a Brentford goal. Brighton found ways to break down Brentford’s mid and low block by using third man passes, but rarely found success after these sequences.
The Bees capitalized on a typical Brentford free kick routine late in the match to seal it. Brentford now face Nottingham Forest on May 1st, which should allow time to rest and injured players to get back fit.


